Status Bar Success Toast
You can trigger the success status bar by inserting a new row into the grid.
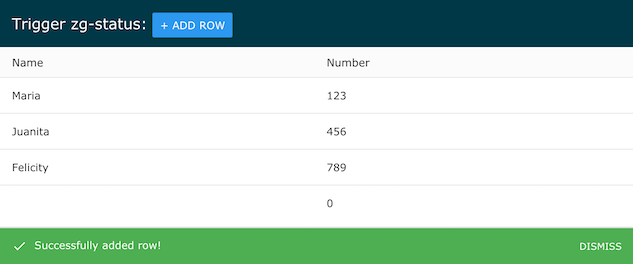
Result
Full
HTML
CSS
JS
Edit
Download
Full Code
<!DOCTYPE html>
<html>

<head>
  <meta charset="utf-8">
  <title>ZingGrid: zg-status basic usage</title>
  <script nonce="undefined" src="https://cdn.zinggrid.com/zinggrid.min.js"></script>
  <style>
    .zg-body {
      background: #e6e6e6;
    }

    .zg-body .button {
      background: #2B98F0;
      border: none;
      border-radius: 2px;
      color: #fff;
      cursor: pointer;
      font-size: .875rem;
      padding: .5rem .625rem;
      text-transform: uppercase;
    }

    .zg-body .button:hover {
      background: #1b6ead;
    }

    zing-grid[loading] {
      height: 333px;
    }
  </style>
</head>

<body class="zg-body">
  <zing-grid context-menu height=200>
    <zg-caption>Trigger zg-status: <button class="button" id="insertBtn">+ Add Row</button></zg-caption>
    <zg-data data='[
        {
          "name": "Maria",
          "number": 123
        },
        {
          "name": "Juanita",
          "number": 456
        },
        {
          "name": "Felicity",
          "number": 789
        }
      ]'>
    </zg-data>
  </zing-grid>
  <script>
    ZingGrid.setLicense(['26ccbfec16b8be9ee98c7d57bee6e498']); // window:load event for Javascript to run after HTML
    // because this Javascript is injected into the document head
    window.addEventListener('load', () => {
      // Javascript code to execute after DOM content
      let zgRef = document.querySelector('zing-grid');
      zgRef.executeOnLoad(function() {
        insertBtn.addEventListener('click', function() {
          zgRef.insertRow();
        });
      });
    });
  </script>
</body>

</html>
<!DOCTYPE html>
<html>
  <head>
    <meta charset="utf-8">
    <title>ZingGrid: zg-status basic usage</title>
    <script src="https://cdn.zinggrid.com/zinggrid.min.js"></script>
  </head>
  <body class="zg-body">
    <zing-grid
      context-menu
      height=200>
      <zg-caption>Trigger zg-status: <button class="button" id="insertBtn">+ Add Row</button></zg-caption>
      <zg-data data='[
        {
          "name": "Maria",
          "number": 123
        },
        {
          "name": "Juanita",
          "number": 456
        },
        {
          "name": "Felicity",
          "number": 789
        }
      ]'>
      </zg-data>
    </zing-grid>
	</body>
</html>
.zg-body {background:#e6e6e6;}

.zg-body .button {
  background: #2B98F0;
	border: none;
  border-radius: 2px;
  color: #fff;
  cursor: pointer;
  font-size: .875rem;
  padding: .5rem .625rem;
  text-transform: uppercase;
}

.zg-body .button:hover {
	background: #1b6ead;
}
// window:load event for Javascript to run after HTML
// because this Javascript is injected into the document head
window.addEventListener('load', () => {
  // Javascript code to execute after DOM content
	let zgRef = document.querySelector('zing-grid');
  zgRef.executeOnLoad(function() {
  	insertBtn.addEventListener('click', function() {
    	zgRef.insertRow();
    });
  });
});
Interested in this demo? Modify it to your needs in ZingSoft Studio, our testing sandbox. It's free to sign up, and you can come back and edit at any time!